In this Google Sheets training tip, you will learn how to insert and remove rows and columns in a Google Sheet. Sometimes, when you are working with Google Sheets, you will need to shift things around and add or remove rows/columns. Check out the quick video below or read through the written explanation.
Step 1: Adding/Removing Columns from the Insert Menu

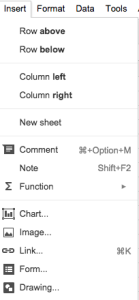
The easiest way to add and remove rows and columns in Google Sheets is to use the Insert menu. Depending on what type of cell you have selected, you can insert rows or columns from the insert menu. If you have a row selected, the Insert menu will assume you want to insert a row. If you have a column selected, the Insert menu will assume you want to insert a column.
This option gives you the ability to add a row above or below the currently selected row or cell or a column to the left or right of the current selection.
Step 2: Adding/Removing Columns from Columns Headers
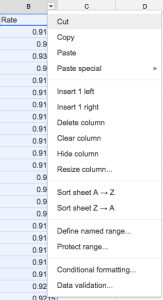
If you click on the drop-down menus attached to each column, you can insert a column from these menus. This option is ideal when you have a specific column that you want to insert another column adjacent to it.
You can also delete rows or columns using this method by clicking on the “Delete column” option listed in the drop-down menu.
As you can see, there are also a number of other handy tools contained in these menus.
Step 3: Adding/Removing Columns by Right Clicking a Row Header
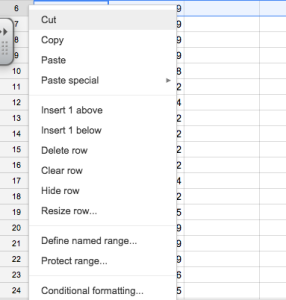
Lastly, you can add or remove rows by right clicking on the row headers.
This option is ideal when you have a specific row that you want to insert another row above or below.
You can also delete rows using this method by clicking on the “Delete row” option listed in the drop-down menu.
As you can see, there are also a number of other handy tools contained in these menus.
